Hey there, if you’re working with UV weather resistance test chambers, you know getting the temperature right isn’t just a “set it and forget it” kind of thing. Let me tell you— I’ve been supplying these chambers for over 10 years, and I can’t count how many times a customer has hit me up saying, “My test results are all over the place, what’s wrong?” 9 times out of 10, it’s a temperature glitch. Don’t get me wrong, UV exposure is the star here, but temperature is the unsung sidekick that makes the whole test accurate. Skip this, and your data’s useless. Let’s break down how to dial that temp in like a pro— no fancy engineering degree required, just real, hands-on tips from someone who actually builds these chambers, not just reads about ’em. UV Weather Resistance Test Chamber
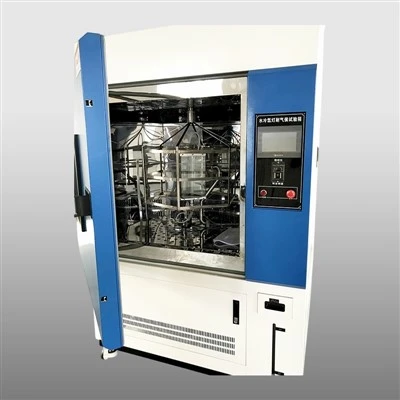
First off, let’s get one tiny myth outta the way: not all UV chambers run temp the same. A lot of new customers mix up the chamber’s air temp vs. the sample surface temp. Here’s the tea: most chambers measure temp in the air inside the cabinet, right above the UV lamps. But what your actual test material feels? That’s the real number you need to hit. For example, if you’re testing car paint, the paint’s surface needs to be 60°C (140°F) for most standard ASTM G154 runs, not just the air hitting it. I see people mess this up all the time— they set the air temp to 60, and wonder why their plastic samples melt or don’t degrade like they should. Pro tip: check your chamber’s user manual to see if it has a “surface temp mode” vs. “air temp mode.” If it doesn’t? Grab a cheap non-contact IR thermometer (wait till the lamps have been on for 30 mins to let things stabilize) and zap the sample surface. That’s your baseline.
Next, pre-heat time is non-negotiable. I get it, you’re busy, you have a schedule, you wanna load samples and start testing. But here’s the thing— UV lamps and the chamber’s heating system need time to sync. If you hit “start” 10 mins after turning it on, the temp will fluctuate like crazy for the first hour, and your first 100 test hours are gonna be garbage. How long? For most standard chambers (the ones 2–3 lamp banks, 1000L capacity), 45–60 mins of pre-heat is enough. If you’re running a custom test with extra humidity or a different lamp type (like UVA-340 vs. UVB-313), add 15 more mins. Trust me, I’ve had a customer skip this once, and their 1000-hour test had a ±5°C swing— they had to redo the whole thing, cost ’em thousands in material and time. Don’t be that guy.
Then, there’s adjusting temp during the test, not just at the start. A lot of newer chambers have automated controls, but even the best ones can drift a little if you’re running extreme conditions. Let’s say you’re doing a humidity cycle with UV— when the spray kicks on, it cools the air in the chamber, right? The heating system has to work extra hard to get back to setpoint, and sometimes it overshoots. If you see the temp spike or drop more than ±2°C from your target, it’s time to tweak the PID settings. Wait, what’s PID? Don’t panic— it’s the auto-tuning function that adjusts the heating/cooling power to keep temp steady. Most chambers let you access PID settings through the control panel (I make sure to label mine clearly so new users don’t get lost). If you’re seeing overshoot, lower the “proportional band” a tiny bit, or adjust the “integral time” by 10%. Start small— changing one setting at a time, test it for a cycle, don’t go messing with all of ’em at once. I’ve had a customer crank PID settings up to 100% once, and their chamber blew a heating element. Oops.
Also, don’t sleep on where your samples are placed. This is another big one. If you stack a big plastic panel right next to a lamp, it’s gonna get hotter than a small sample off to the side. Rule of thumb: space samples at least 5cm (2 inches) away from each other and from the lamp bank. Don’t block the air vents inside the chamber— those little slits on the sides or back are how the heated air circulates. If you stack a sample over a vent, that area will be 5–10°F warmer than the rest. I always tell my customers to arrange samples in a grid, no overlaps, and leave all vents clear. I once had a bike parts customer who kept getting uneven corrosion on their metal brackets— turned out they stacked a big aluminum part over two vents, so the small brackets above it were way hotter. Moving the stack fixed their problem overnight.
Wait, what about when you need to adjust temp between cycles? Like, some tests go from UV exposure (60°C) to condensation (40°C) overnight. A lot of people just set the next cycle’s temp and leave, but make sure the chamber is purged a little before switching. The moisture from the condensation cycle can linger in the air and mess with the temp sensor, making the next UV run start off too cold. If your chamber has a “purge” function, run it for 5 mins before switching cycles. If not, open the door (quickly, don’t waste too much energy) to let old air escape, then seal it up and let it re-stabilize. Another thing: if you’re running a longer test (like 1000 hours), check the temp sensor at least once every 200 hours. Dust can build up on the sensor over time, which makes it read wrong. Just wipe it with a soft dry cloth, don’t use water or chemicals. I keep a little cloth in every chamber I sell for exactly this.
Oh, and let’s talk about different scenarios, because not every test is the same. If you’re testing outdoor building materials (like roof shingles), the standard temp is usually 70°C, and you’ll need to bump the lamp power a little to hit that surface temp— those samples are thicker, so air temp alone won’t cut it. If you’re testing electronics parts that can’t handle high heat, you can drop the temp to 45°C, but you still have to make sure the sample surface is at that number, not just the air. Don’t forget to check your test standard! Most ASTM, ISO, or SAE guidelines list the exact temp you need, so don’t just guess based on what worked last time. I tell every new customer to print out their standard and tape it to their chamber— it’ll save you so much headache.
Now, if you’re using an older chamber that’s not holding temp steady at all? Maybe the heating element is worn out, or the cooling system (yes, some chambers have cooling for low-temp cycles) is on the fritz. That’s a whole other thing— I get service calls all the time for that. If your chamber is more than 5 years old, it’s worth having a pro (like me, obviously) come check the parts, instead of messing with the control panel and making it worse. I’ve seen people try to fix a faulty heating element by cranking the temp up, and end up breaking the sensor. Not cool.
Here’s the thing: when you nail the temp, your UV test results are reliable. No more arguing with your quality team about why two tests gave different numbers, no more redoing expensive batches of samples. It’s the small, consistent adjustments that make the biggest difference. If you’re just starting out with a UV chamber, or you’re running into temp issues that you can’t figure out, hit me up to chat. We can talk through your test standards, your chamber model, and what’s going wrong— no pushy sales stuff, just real advice from someone who’s been in this game for years. I’ve helped everyone from small startups testing phone cases to big auto companies testing car exteriors get their temp dialed in right.

If you’re looking to upgrade your current chamber or get a new one that’s easy to adjust and has stable temp controls, reach out. We can go over your specific needs, answer all your questions, and make sure you get a chamber that works for your tests. No generic one-size-fits-all junk here, just gear built for accurate, repeatable UV weather testing.
References
Sand-Dust Test Chamber ASTM G154-21, Standard Practice for Operating Fluorescent Ultraviolet (UV) Lamp Apparatus for Exposure of Nonmetallic Materials
ISO 4892-3:2016, Plastics – Methods of exposure to laboratory light sources – Part 3: Fluorescent UV lamps
SAE J2020-19, Accelerated Weathering of Automotive Interior Materials Using Fluorescent UV Light and Water
ALP Technology (T&M) Ltd.
With abundant experience, we are one of the most reliable uv weather resistance test chamber manufacturers and suppliers in China. Please feel free to buy advanced uv weather resistance test chamber for sale here from our factory. All customized products are with high quality and competitive price.
Address: No.19, Mingde Road, Xi’an, China
E-mail: info@alp-environment.com
WebSite: https://www.alp-environment.com/
