If you’ve spent any time scrolling through art spaces or home decor feeds lately, you’ve probably seen them: luminous, flowing resin sculptures that catch the light like nothing else—they feel equal parts timeless and futuristic, soft yet unapologetically bold. For a long time, I thought these pieces were reserved for professional artists with a lab of specialty supplies and years of training. Then, a few years back, I watched a hobbyist at a local art class ruin a beautiful resin piece because she used the wrong mixing ratio and skipped a critical curing step. That’s when I realized this medium isn’t just for experts—it’s accessible, but only if you do it right. As a cured resin supplier, I’ve walked hundreds of artists, hobbyists, and even small business owners through every step of creating their first sculpture, and today I’m breaking down the process from start to finish—no fancy degree required, just patience and the right tools. Cured Resin

First, let’s get one thing straight: not all resin is created equal. There’s casting resin, epoxy resin, polyester resin, and even specialty UV-cured resin, and each works very differently for sculptures. For 3D, free-standing art, cured epoxy resin is our go-to here. It’s durable, has a high-gloss, scratch-resistant finish, and cures to a hard, stable structure that holds its shape for decades. Too many people skip the research and grab the cheapest resin they can find online, only to end up with a piece that remains tacky for months, yellows in sunlight, or cracks after a few months. That’s why, when I advise new creators, I always start with choosing the right resin.
Before you even open a resin bucket, you need a plan. Resin is permanent once it cures, so there’s no do-over if you mess up the base structure. I always tell first-timers to sketch their design first, then build a small armature—this is the internal framework that keeps your sculpture’s shape while the resin cures. Armatures can be made from anything sturdy: wire, wooden dowels, even repurposed plastic or metal pieces, as long as they won’t leach chemicals or react with resin. For a small, abstract sculpture (like a 12-inch flowing form), a simple wire armature shaped to match your design will work. For larger, more complex pieces, adding wooden supports to the base will prevent the armature from bending under the weight of the resin. Pro tip: leave a small portion of the armature exposed at the bottom—this will let you anchor it to a display stand later, so your finished sculpture stays upright.
Next, prep your work area and your supplies, because resin is messy and unforgiving if you rush. Cured epoxy resin cures best in a clean, temperature-controlled environment—between 70 and 75 degrees Fahrenheit (21 to 24 degrees Celsius) is ideal. If it’s too cold, the resin will cure slowly, might not harden fully, and can develop cloudy spots from trapped moisture. If it’s too hot, it will cure too fast, leaving bubbles that can’t escape and potentially scorch. Cover your work surface with plastic sheeting, and wear nitrile gloves (latex will break down with resin), safety glasses, and a mask—resin fumes, while not toxic when cured, can be irritating if you’re working in a small space. Also, gather your mixing tools: plastic cups (reusable or disposable, just make sure they’re not paper), wooden stir sticks, a heat gun or a small torch (for bubbles), and any additives you want to use: pigments, metallic powders, glitter, or even small inclusions like dried flowers, shells, or tiny pieces of fabric. Here’s a critical note from years of working with artists: always read your resin’s specific mixing instructions. Our cured epoxy resin calls for a 1:1 ratio by volume—equal parts Part A (resin) and Part B (hardener). Never guess the ratio; even a 10% difference will throw off the cure.
Once you have your armature set, it’s time to mix your resin. Start by measuring both parts into a clean cup. Pour Part A first, then Part B, and stir slowly but thoroughly for two to three minutes. Scrape the sides and bottom of the cup often—this is where unmixed resin can hide, and that’s the number one cause of soft spots in cured pieces. If you’re adding pigments or additives, wait until the resin is fully mixed before adding them. A common mistake is adding powder too fast, which creates clumps that are impossible to smooth out. For metallic or pearl pigments, use no more than 1 teaspoon per 16 ounces of resin—too much will make the resin thick, hard to pour, and prone to bubbles. For inclusions, make sure they’re completely dry before adding them; even a tiny drop of water will create bubbles or cloudy patches in the final piece.
Now comes the fun part: pouring the resin. Start with a thin first coat to coat your armature and the base of your sculpture. This first layer seals the armature so resin doesn’t seep into the wire or wood and create lumpy spots, and it gives you a smooth surface to build subsequent layers. Pour the resin slowly, working in small sections so it doesn’t run off the sides of your sculpture. After pouring each layer, you’ll see small bubbles rise to the surface. This is where that heat gun or torch comes in—hold it 6 to 8 inches above the resin and move it in a steady, circular motion. Don’t hold it too close, or you’ll burn the resin and leave ugly discolored spots. The heat will make the bubbles pop quickly without damaging the cure. For larger sculptures, you’ll need to build up layers gradually, waiting 24 to 48 hours between each layer. The time between layers depends on your specific resin—check your supplier’s instructions, but as a general rule, if the previous layer is hard to the touch and still has a slight shine, it’s ready for the next pour.
If you’re adding color gradients or embedded elements, this is the time to plan your layers. For example, if you want a sculpture that fades from deep blue at the base to clear at the top, pour a layer of light blue resin first, let it sit for 10 minutes (so it starts to thicken slightly), then pour the dark blue resin on top. The slight viscosity difference will make the two colors blend seamlessly instead of mixing completely. For inclusions like dried flowers or shells, arrange them on the first layer of resin before it cures, then pour a thin layer of clear resin over them to seal them in. Make sure they’re fully submerged—any part of an inclusion that sticks out will leave a bump on your finished sculpture.
Once your final layer is poured and all bubbles are popped, the only thing left is the curing phase, and this is where patience pays off. I can’t tell you how many times a new artist has checked their sculpture after 24 hours, only to be frustrated that it’s still slightly soft. Our cured epoxy resin is a room-temperature cure, which means it takes 7 full days to reach 95% of its full hardness, and 2 weeks to fully cure. Rushing this step is a surefire way to end up with a sculpture that scratches easily, dents, or even bends over time. Keep your sculpture in its work area during curing—avoid moving it, even slightly, because it’s still malleable for the first 72 hours. If it’s exposed to extreme temperature changes during this time, it can develop cracks or cloudy spots.
After the full cure, you might notice a few small imperfections: a faint cloudy haze on the surface, or tiny uneven spots. These are easy to fix with a little light sanding and polishing. Start with 2000-grit sandpaper, wet-sanding the surface in a circular motion until the haze is gone, then move to 3000-grit, followed by a polishing compound and a soft cloth. This will bring back that signature high-gloss finish that makes resin sculptures stand out. For any small scratches that did form during sanding, a light polish will smooth them right out.
Now, let’s talk about common mistakes I see new artists make, so you can avoid them. First, overheating your work area during curing—we’ve had artists send us photos of sculptures that cured in 85-degree heat, only to have large bubbles form all over the surface. Second, not mixing the resin thoroughly—we once received a returned bucket from an artist who claimed our resin was “bad,” only to look at her mixing notes and see she stirred for 30 seconds and only scraped the sides once. Third, rushing layers—pouring a new layer before the previous one is fully cured leads to the two layers mixing too much, creating a cloudy, uneven piece that’s structurally weak. And finally, using the wrong armature—too thin a wire for a large sculpture will bend, and metal armatures that aren’t coated will react with resin over time, leaving dark stains.
If you’re just starting out, I always recommend practicing on small, simple pieces first. A 6-inch abstract sculpture with no inclusions will let you master mixing, pouring, and curing without the pressure of a complex design. Once you’re comfortable, you can experiment with larger pieces, color gradients, embedded elements, even mixed-media pieces that combine resin with wood, stone, or metal accents. As a cured resin supplier, we’ve supported thousands of creators from beginner hobbyists to professional artists who have exhibited their resin sculptures in galleries across the world, and we know that with the right guidance, anyone can create a piece they’re proud of.
Creating a resin art sculpture is equal parts science and creativity—you have to follow the steps carefully, but there’s room to experiment and make something that’s uniquely yours. Whether you’re making a statement piece for your living room, a custom gift for a loved one, or even starting a small business selling resin art, the process is rewarding. If you’re ready to gather your supplies and get started, or you have questions about which resin is right for your project, our team is here to help. We can walk you through mixing ratios, curing times, and best practices, to make sure your sculpture turns out exactly how you envision.
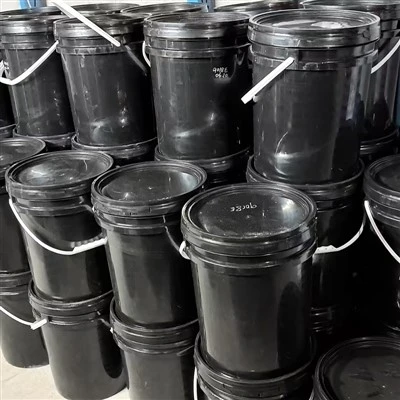
If you’re ready to take your resin art to the next level and get the high-quality cured resin you need for your next project, don’t hesitate to reach out to our team to discuss your requirements and place an order. We’re here to support creators at every step of their resin art journey.
Cured Resin References:
- Smith, J. (2021). The Complete Guide to Epoxy Resin Art for Sculpture. Art Media Press.
- Thompson, L. (2019). Cured Resin Curing Science: Temperature, Ratio, and Final Product Integrity. Journal of Art Materials Science, 12(3), 45-62.
- Carter, M. (2022). Common Pitfalls in Resin Sculpture Creation and How to Avoid Them. Contemporary Craft Quarterly, 18(2), 112-127.
- Resin Industry Standards Association. (2020). Specifications for Cured Epoxy Resin Used in Fine Art. Global Art Materials Guidelines.
Winsir Decoration Materials Co., Ltd.
With abundant experience, we are one of the most professional cured resin manufacturers and suppliers in China. Please feel free to wholesale bulk cured resin in stock here from our factory. Good service and quality products are available.
Address: Zhonghe Village Industrial Zone, Duruan Town, Pengjiang District, Jiangmen City
E-mail: service@winsir.com.cn
WebSite: https://www.winsir-intl.com/
